Printing
In the February 2003 I have
discovered
the advantages of etching sheet metal parts.
Though my father used Positiv 20 photosensitive emulsion and photoeching techniques
for many years to make PCB at home, the results were always rather bad and I never fought
about etching sheet metal this way.
Only recently we both have read about the method of transferring a toner from a laser printout
onto a metal surface. The results are very good and I believe that with practice will be marvelous.
To etch a part I do the following:

- I prepare a mask pattern. As the toner side must touch the sheet metal, the pattern should have proper symmetry.
- I print it on a glossy paper. In Poland they sell so called "chalk" paper for high quality printout.
It easily tears into slices when wetted.
|
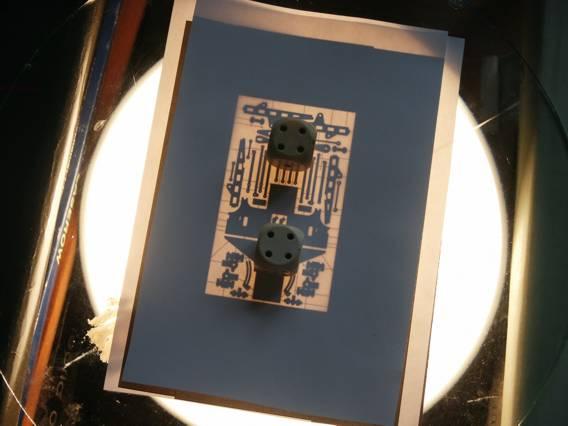
- I cut the printed pattern into parts for both sides of the sheet metal.
Then carefully I align them on a glass brightly lit from behind.
- I glue both sheets at 2 sides into an envelope.
- Slide the sheet metal into an envelope. Its important that the sheet metal is flat.
Usually it is not at the edges, due to cutting, and there you should expect the transfer to fail.
|
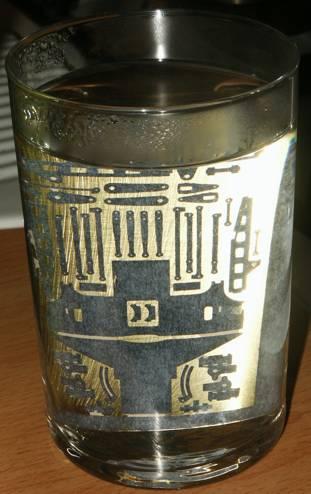
- Iron. Best with an old and heavy iron, set for temperature marked with 2 dots.
The printed pattern should become visible on the outside at the whole surface. In places where the sheet metal
is uneven I help myself with the edge of the iron.
- Wait for the job to cool down.
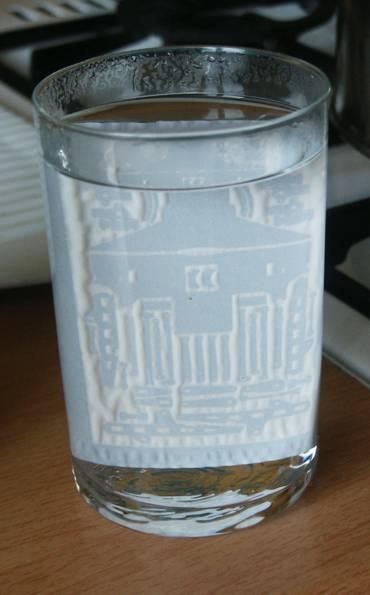
- Dip it in hot water and wait for the paper to soften.
- Tear the paper away gently with a thumb, dip again.
When your part has a lot of small holes, you will unevitably spend quite a while on this.
- The sheet metal is ready for etching.
Last time I used solution of
H2O, 30% H2O2, 27% HCl in proportions of 15:5:2
(WARNING: very corrosive).
It was too dense, heat up during etching, bubbled and sprayed.
|

|
|
The results are far from ideal for 0.5 mm thick brass. I had to bore and file them. But hey, I would never make such a shapes using pair of scissors.
|